
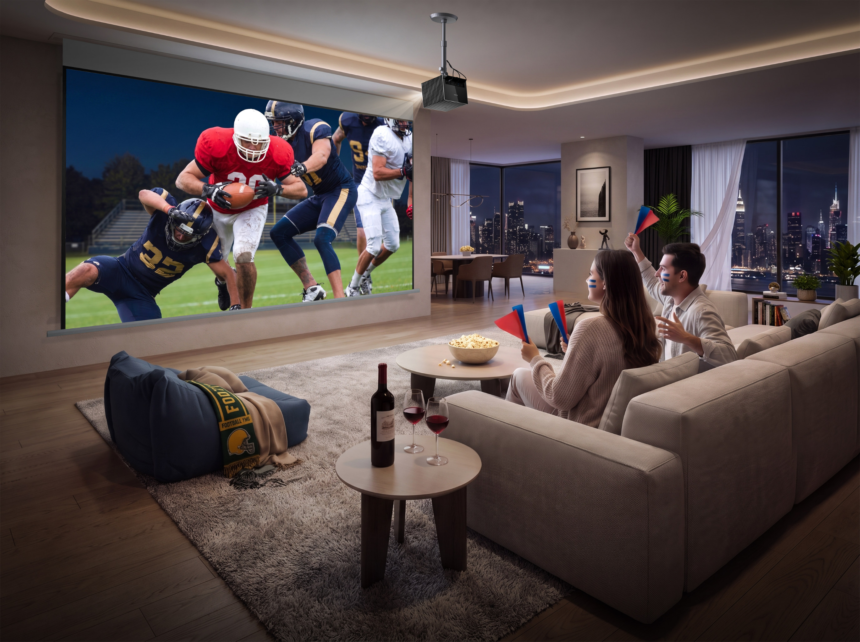
You’ve cleared a wall for a 120-inch screen, picked out a comfortable couch, and started imagining movie nights at home. There’s just one problem: Where exactly should the projector go?
Ten feet away? Fifteen? Somewhere behind the couch?
The answer depends on a specification that’s easy to overlook when shopping for home theater equipment: throw ratio. Two projectors can produce the same 120-inch image while sitting several feet apart.
Before installing a ceiling mount or buying a media cabinet, it’s worth doing a little math. The calculations are straightforward, and they can save you from discovering that your projector doesn’t fit the room.
The Short Answer: It Depends on Throw Ratio
For a 120-inch screen with a standard 16:9 aspect ratio, the visible image measures approximately:
- Width: 104.6 inches (8.72 feet)
- Height: 58.8 inches (4.9 feet)
- Diagonal: 120 inches (10 feet)
These dimensions matter because projector distance is calculated using screen width, not the diagonal measurement advertised on the box.
The formula is:
Throw Distance = Image Width × Throw Ratio
For example, if your projector has a 1.2:1 throw ratio:
104.6 inches × 1.2 = 125.5 inches
That’s approximately 10 feet 5.5 inches between the projector lens and the screen.
A projector with a 1.5:1 throw ratio, however, would need approximately 13 feet 1 inch for the same image.
That’s a difference of more than two and a half feet—enough to determine whether your projector fits comfortably in the room.
Here’s a quick reference table.
| Projector Throw Ratio | Approximate Distance for a 120-Inch Screen |
| 0.9:1 | 7 ft 10 in |
| 1.0:1 | 8 ft 9 in |
| 1.2:1 | 10 ft 5.5 in |
| 1.5:1 | 13 ft 1 in |
| 2.0:1 | 17 ft 5 in |
These are calculated lens-to-screen distances for a 16:9 image, not installation specifications for particular projector models.
Remember that the projector’s body occupies additional space. A ceiling-mounted projector also needs room for its mounting hardware, cables, and ventilation.
Always confirm the actual installation range in the manufacturer’s documentation before drilling holes or ordering furniture.
Why Long-Throw Projectors Need More Room
Projectors are commonly described as ultra-short-throw, short-throw, or standard/long-throw models.
These terms indicate how much distance the projector needs to create a particular image size.
An ultra-short-throw projector sits close to the viewing wall, while a conventional long-throw design typically operates from farther back in the room.
Neither arrangement is automatically better.
A long throw projector can be a practical choice for dedicated media rooms where the equipment can sit behind the audience or hang from the ceiling.
That placement keeps the projector away from the main viewing area and reduces the likelihood of someone walking through the light beam.
It’s particularly useful when the room already has a suitable ceiling position or rear shelf.
In a smaller living room, however, the available distance may be more restrictive.
Consider a room that’s 12 feet deep. The maximum possible lens-to-screen distance will be less than 12 feet once you account for the projector’s position and physical clearance.
A projector requiring 13 feet for your desired image simply won’t fit at that size.
That’s why room depth should influence your projector choice before installation begins, not afterward.
Optical Zoom Gives You Some Breathing Room
Not every projector has one fixed throw ratio.
Many home theater models include optical zoom, allowing the image size to change without moving the projector.
A projector might, for example, have a throw-ratio range of 1.2–1.5:1.
For a 120-inch screen, that translates to an approximate placement range of:
| Zoom Position | Throw Ratio | Lens-to-Screen Distance |
| Wide end | 1.2:1 | 10 ft 5.5 in |
| Middle of range | 1.35:1 | 11 ft 9 in |
| Telephoto end | 1.5:1 | 13 ft 1 in |
This means you don’t have to install the projector at one exact distance.
If your room allows an 11-foot throw, for instance, a projector with this hypothetical zoom range could produce the required image size.
That flexibility is valuable when working around ceiling joists, lighting fixtures, or existing furniture.
However, optical zoom has limits. Moving the projector outside its supported throw-distance range can’t always be corrected by turning the zoom control.
Also, don’t confuse optical zoom with digital zoom.
Optical zoom adjusts the projected image through the lens system. Digital zoom modifies the image electronically, potentially reducing the amount of source detail used in the displayed picture.
For a permanent home theater installation, physical placement and optical adjustments should do most of the work.
Lens Shift Helps Position the Picture—Not Change the Distance
Throw ratio and optical zoom determine how large the image can be from a given position.
Lens shift solves a different problem: where that image appears on the screen.
Suppose your projector is installed on a rear shelf, but the picture lands slightly too high.
A projector with sufficient vertical lens shift may allow you to move the image downward without tilting the entire unit.
Some models also offer horizontal adjustment.
This can be particularly useful in rooms with exposed ceiling beams or other architectural obstacles.
However, lens shift doesn’t allow unlimited placement freedom. Every projector has a specified adjustment range, and the available vertical and horizontal movement may interact.
It’s also different from keystone correction.
Keystone correction digitally reshapes an image to compensate for distortion caused by projecting at an angle. Although convenient, substantial correction can reduce effective image detail and introduce scaling artifacts.
A better installation sequence is to position the projector physically, adjust optical zoom and lens shift where available, and use digital correction only when necessary.
You’ll generally achieve a more predictable result.
Don’t Buy the Screen Based on Diagonal Size Alone
A 120-inch screen sounds like a straightforward purchase, but the visible image is only part of its overall dimensions.
Fixed-frame screens include borders and supporting structures. Motorized screens need space for their housings. Portable screens may require stands or additional clearance around the viewing area.
Measure the available wall width and height before choosing one.
For a standard 16:9 image, a 120-inch screen needs approximately 8 feet 9 inches of visible width.
If your wall is 10 feet wide, that leaves roughly 15 inches of space before accounting for the screen’s outer frame.
That may be sufficient, but it’s worth checking the manufacturer’s complete product dimensions.
Screen material also deserves attention.
A suitable projector screen provides a consistent viewing surface, helping avoid the uneven texture and color variations sometimes found on ordinary painted walls.
Matte white screens are a familiar option for rooms with controlled lighting, while certain ambient light rejecting materials are designed to manage unwanted light from specific directions.
The right choice depends on the projector, lighting conditions, seating positions, and intended installation.
Not every screen material performs equally well with every projection angle, so compatibility matters.
What About Screen Height?
The bottom of the image shouldn’t force viewers to tilt their heads upward throughout a movie.
For a 120-inch 16:9 screen, the visible image is about 59 inches tall.
If its bottom edge sits 24 inches above the floor, the top edge will reach approximately 83 inches.
In a room with an 8-foot ceiling, that leaves around 13 inches above the visible picture, before accounting for any screen frame or housing.
That example illustrates why ceiling height matters alongside wall width.
In low-ceiling rooms, the available vertical space can become the limiting factor even when the wall is wide enough.
A Realistic Example: Planning a 120-Inch Setup in a 14-Foot Room
Imagine a rectangular media room measuring 14 feet from the screen wall to the opposite wall.
You want a 120-inch image and plan to install the projector near the rear of the room.
Your preferred model has a hypothetical throw-ratio range of 1.2–1.5:1.
Based on the calculations above, its usable lens-to-screen range for a 120-inch image is approximately 10 feet 5.5 inches to 13 feet 1 inch.
That sounds promising.
But you still need to account for the projector’s chassis and its clearance from the rear wall.
If the lens ends up 12 feet from the screen, the required throw ratio is:
144 inches ÷ 104.6 inches = approximately 1.38:1
That falls within the hypothetical projector’s zoom range.
Next, check the remaining installation details.
| Measurement | Example | What to Verify |
| Room depth | 14 feet | Clearance behind the projector |
| Image diagonal | 120 inches | Available wall dimensions |
| Image width | 104.6 inches | Screen frame and side clearance |
| Lens-to-screen distance | 12 feet | Supported zoom range |
| Required throw ratio | Approximately 1.38:1 | Projector compatibility |
| Ceiling height | 8 feet | Screen height and mounting position |
Based on throw ratio alone, the arrangement is feasible.
That doesn’t mean installation is guaranteed. You’ll still need to verify the exact lens position, vertical image offset, mounting height, and ventilation requirements.
But you’ve already eliminated one major source of uncertainty before spending money.
Five Checks Before You Install Anything
Once you’ve calculated the distance, it’s tempting to start mounting hardware immediately.
Hold off until you’ve checked these details.
1. Measure from the correct reference point. Throw-distance calculations generally use the lens-to-screen relationship. The manufacturer’s installation drawing will specify the reference point for its measurements. Don’t substitute the back of the projector.
2. Confirm the optical zoom range. Your calculated distance must fall within the model’s supported range for the intended image size.
3. Check the mounting height and image offset. A projector may produce the right image size while placing it too high or too low for your screen.
4. Leave clearance for cables and airflow. HDMI connectors, power cables, and ventilation openings need adequate space. Follow the manufacturer’s stated requirements.
5. Test before drilling. Place the projector securely at its proposed location, if practical, and display an alignment grid. Verify image size, focus, and positioning before making the installation permanent.
This last check is especially valuable. A quick test can reveal an obstruction or alignment issue that isn’t obvious from measurements alone.
Can You Go Bigger Than 120 Inches?
Perhaps your original plan was 120 inches, but the wall could accommodate 135 or even 150 inches.
Would going bigger be worthwhile?
Possibly—but increasing image size affects more than the available wall space.
With the same projector and screen characteristics, spreading the light across a larger surface generally reduces image brightness per unit area.
Larger pictures also occupy more of your field of view. That’s excellent for cinematic immersion, but it may feel excessive if the seating is too close.
And because throw distance depends on image width, increasing screen size usually means moving the projector farther back or changing its optical zoom setting.
Before upsizing, consider whether your projector can deliver a satisfactory image at the larger size under your actual room lighting.
For many homes, a properly positioned 120-inch screen offers an appealing balance between scale, brightness, and comfortable viewing.
But personal preference still matters. The right size is the one that suits both the room and the people watching.
The Best Projector Position Is the One You Plan in Advance
There’s no universal distance between a projector and a 120-inch screen.
One model may need less than eight feet, while another requires more than seventeen. The difference comes down primarily to throw ratio, with optical zoom providing additional placement flexibility.
The good news is that you don’t need to be an installation expert to understand the basics.
Start with the screen width, multiply by the projector’s throw ratio, and check whether the resulting distance fits your room.
Then verify the details that calculations alone can’t solve: screen height, image offset, lens adjustment, mounting clearance, and actual viewing conditions.
A few careful measurements now can save hours of frustration later—and help make that 120-inch movie night exactly what you imagined.